Tuesday, December 17, 2013

Butterfly


  • For this assignment I had to create a butterfly image with a flower. I had to use layers and the picture had to be original.
  • First I started with the background. I made a rectangle and fit it to my canvas. I gave it and inner bevel and its own layer. I did this for the blue background as well. For the yellow background I gave it an inset emboss to make the picture look framed.
  • Now onto the flower. I used the polygon tool and adjusted the sides and angles to give a flower shape. Then I moved the handles around to make it not as sharp looking. I did the same steps with the inner flower and grouped it with the pink flower. I gave each flower an inner bevel.
  • For the stem I used the pen tool to create points and just connected them to make a stem shape. I make the stem and the flower separate layers. I also gave the stem an inner bevel.
  • For my butterfly I only used the circle and swirl tool to make the shapes. I added points and adjusted them to make the wings. To make sure the wings were symmetrical I copied one and went to modify, transform, and flip horizontal. Then I made a bunch of different circles and ovals to make the wings prettier. Then I gave the wings a texture and grouped the butterfly together with Ctrl-G. 
  • Then I used the text-box tool to add my name.


Thursday, December 12, 2013

Spot Color

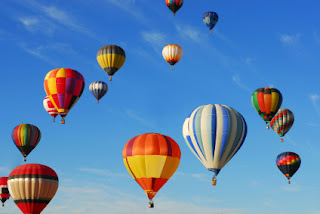
Hot air balloons


This assignment is the same as the raintree. I had to choose my own images and make one object colored and the rest sepia or gray toned. I used the same technique for each photo. First I used the lasso or marque tool (depending on the objects shape) and traced the outline of the object. Then I clicked Ctrl-Shift-I, which out lines the whole pictures border. Next I went to Commands, Creative, then Sepia or Grayscale. Then If there are still places that have color, take the magic wand tool and click on the area, and change it to grayscale or sepia.
Basketball


Converse


Wednesday, December 11, 2013

Rain tree


For this assignment I had to take this picture and make everything but the leaves sepia tones. So first I used the lasso tool and outlined the shape of the of the tree (minus the trunk). Then I did Ctrl-Shift-I and went to Commands, Creative, then Sepia Tones. Now everything I didn't lasso is sepia toned. Next I took the magic wand tool and changed my settings to Hard and 81. This allows me to click on the places that still have color. I continued doing this until almost all my color besides the leaves are sepia.

Tuesday, December 10, 2013

My Alphabet (Font Name- Jagged)


For this assignment I had to create my own font. I started by typing the letters of the alphabet in capitol and lowercase letter. Each set of letters (Aa, Bb, Cc,..etc) is in its own layer. Then I chose one set of letters, clicked on text and chose 'convert to paths'. Then I selected Ctrl-Shift-G to un-group the letters. Now I can individually change the shape of each letter. I started by adding points to the sides of my letters and made them look jaggedy. Hence the name "Jagged".

Tuesday, December 3, 2013

Cornucopia Assignment


For this assignment I had to create a cornucopia for Thanksgiving. The cornucopia had to be filled with fruits and vegetables only grown in fall. So I chose pumpkin, squash, corn, carrots, tomatoes, grapes, an apple, and some flowers for decoration. We had to make this picture using layers and other features in Firework.

The background (layer 11/background):
I used the paintbrush tool and chose a splatter paint around the edges. Then I used the spiral tool and gave it a glow, and put them in the corners.

The cornucopia basket (layer 10/basket): 
First I took the paintbrush tool and made the general shape of the basket. Then filled in the basket with the color I wanted, then scribbled lines to give it texture. Next, I made a circle and gave it an ellipse gradient, I positioned the circle under my basket shape to make it look empty. Then I clicked Ctrl-Shift and grabbed both objects, next I clicked Ctrl-G and that grouped my objects together to make a cornucopia.


The squash (layer 9/squash):
 First I made an oval shape then used the white cursor to move the points to the shape I liked. I gave it a mesh texture and an inner bevel. I then added a stem with the rounded rectangle tool. Then I clicked Ctrl-Shift and grabbed both objects, next I clicked Ctrl-G and that grouped my objects together.

The pumpkin (layer 8/squash):
First I made 3 ovals, then I put the ovals close together, I used the white cursor to make the two outer ovals to the shape I wanted. I gave all 3 shapes an inner bevel. For the stem I did the exact same steps just with a closed spiral shape. Then I clicked Ctrl-Shift and grabbed both objects, next I clicked Ctrl-G and that grouped my objects together.

The grapes (layer 7/grapes):
First I made one small circle and gave it an inner bevel and a texture. Then I used  Ctrl-Alt to duplicate it and make a bunch of circles. I used the same technique for the leaves and then clicked Ctrl-Shift and grabbed both objects, next I clicked Ctrl-G and that grouped my objects together.

The apple (layer 6/apple):
First I made and oval and duplicated it, then I put the ovals close together and and grouped them. I gave the shape an inner bevel and made a leaf which also has an inner bevel. Then I grouped the leaf with the apple shape.

The corn (layer 5/corn):
First I made one big oval and two smaller ovals. I positioned the two smaller ovals on the outside of the big one and used the white cursor to move the points of the smaller ones to fit the big oval. The bigger oval should be yellow and the small ones should be green. I gave the yellow oval a texture different from the green ones and gave them an inner bevel and grouped them together.

The carrots (layer 4/carrots):
First I made a long oval shape, then moved the points with the white cursor to the position I wanted. Next, I gave it a texture and an inner bevel and duplicated the shape. Then clicked Ctrl-Shift and grabbed both objects, next I clicked Ctrl-G and that grouped my object together.

The tomatoes (layer 3/tomatoes):
First I made a circle and moved the points a little with the white cursor. Next I used the polygon tool and changed how many points it had to make the stem. Then I gave each of them a texture and an inner bevel. Then I finally grouped them together.

The flowers (layer 2/flowers):
First I used the polygon tool and changed the points. Then I gave the flower a texture and an inner bevel, I used the circle tool to make the center and gave it an outer bevel. I grouped the center and flower together and duplicated them to make a bunch of flowers.

The final layer (layer 1/Happy Thanksgiving):
I used the letter tool to type  my title, "Happy Thanksgiving". I highlighted it to choose my font.


Monday, November 18, 2013

Color Emotions

Admiration/Acceptance


For this assignment I had to make 5 different pictures, showing emotion with color. My first color was green. This was to show admiration and acceptance. I started with the background which is a bar gradient with two different shades of green. Then I used the paintbrush tool and made a bunch of random dots in the corner. Next I used the rounded rectangle tool to make several shapes and made them have thick, green outline. And lastly the lines, I used the pencil tool and made green lines coming from the bottom corner.

Depression

My next color was purple. This is supposed to show depression. I started with the background, giving it a linear background, I chose the purples so they complemented each other. Over the gradient is a sand texture. Then I used the paintbrush tool for the bold streaks at the top right corner, and the splatter dots and the bottom left. Then I used the pencil tool with different shades of purple and drew random scribbles.


Joy/Anticipation
The next color I chose was yellow with orange accents. To represent joy and anticipation. The background is the ripples gradient and made it two shades of yellow. Next I used the paintbrush tool to add the orange lines and yellow splatter around the edges. Then I used the polygon tool to make a star and gave it a cone gradient and thick orange outline. After that I used the paintbrush tool again to make the yellow squiggly lines.


Sadness 
 
I chose blue for this picture, which is supposed to represent sadness. The background is a satin gradient with two shades of blue. I made the light blue, cloud like lines with the paintbrush tool, as well as the splatter lines which represent rain. Then I made the puddles with the circle tool and added more into each puddle.

Rage/Anger
For this picture the color I chose is red and is supposed to represent rage or anger. The background is black and red with the waves gradient. Over the gradient is a vein texture. Then using the paintbrush tool I made random lines to cover the picture. The lines are called splatter and viscous alien paint.


Tuesday, November 12, 2013

3 Nameplates

Basic Nameplate


For this assignment I had to make three different nameplates. One had to be basic, mid-level, and professional. For my first nameplate (basic) I used a rounded rectangle and chose a style from the Assets panel for the background. Then I typed my name and used a silly font. I made my name purple and gave it a glow with a raised emboss, and made that green. I also made the canvas color green to match the glow.

Mid-level Nameplate


This is my mid-level name plate. Again I used the rounded rectangle and made my background the blue wave pattern. I typed my name and used a semi-professional font, and made it dark blue. My name also has a blue glow around it. My canvas color complements my background and my name.

Professional Nameplate

Here is my professional nameplate. I used a normal rectangle and fit it to the canvas. For  my background I used the cone gradient and put in my own colors. For my name I used a cursive font and made it the same color as the purple in my background. I also used an inset emboss on my name, which gave it the shadow. And finally for my background I gave it a parchment texture. I hope this helped answer any questions!


Friday, November 8, 2013

Texture and optimize


This assignment I had to make a textured picture, with out using textures. So I chose to make 3-D shapes with a black background. That was the first part! Then I had to make it look weird, or make it lose quality. So I clicked the 4-up button, which gave me four screens with the same image on each of them. Now you can separately edit each off them as a jpeg, gif, tiff, or png file. You do this by going to the optimize panel and playing with the options. Now when you're choosing which one to save you save it as the file you made it in the optimize option.

Tuesday, November 5, 2013

Name Plate #2


This is my second name plate. I also made this one in Firework. Here are some step by step directions on how I made it.

  • Set your canvas for 500 by 300 pixels with a transparent background
  • Choose the shape of your choice
  • Go to the optimize and align panel, select "to canvas", and align the shape vertically and horizontally
  • Select the A in the vector panel, this will create a text box
  • Once you've written your name, you can start adding effects to it
  • In the property panel, there are fill, stroke, and filters the change the effects
  • These same features apply to the background of the shape, so options are endless(for my name plate I used the "wave" design in the gradient option and changed the texture)
  • Once you have the desired design, make sure the  final background is a complementary color 
  • And now you're done!
     

Monday, November 4, 2013

Name Plate


In this assignment I had to take a normal shape and create a name plate. In this case I used a rounded rectangle. I made this name plate in Firework, so you can all sorts of tools. Such as, the fill and texture tool and gradient or pattern tool(found at the bottom of the screen). This helps with what kind of design you want for your name plate. To insert your name you put in a text box. Once your name is in the text box and the correct size, you can change the color and font. Your name can be filled just like the rest of the name plate, to be as creative as you want! Since I used a rounded rectangle, and cut off the background to the perfect size, you want to make sure the background is a complementary color. I hope this helped, have fun making your name plate!

Wednesday, October 23, 2013

Color Symbolism

 What different colors are symbolized as in different countries compared to the U.S.

  red- In the U.S. red is symbolized as victory. In Egypt red symbolizes death.
 
  purple- In the U.S. purple is symbolized as royalty or creativity. In Thailand purple symbolizes mourning for widows.

  blue- In the U.S. blue is symbolized truth and intelligence. In Iran blue is the color of mourning.

  green- In the U.S. green symbolizes nature and ecology. In Thailand green symbolizes Wednesday.
 
  yellow- In the U.S. yellow symbolizes happiness and warmth. In Brunei yellow is a royal color.

  orange- In the U.S. orange symbolizes energy and warmth. In Ireland orange can be symbolized as religious or political.

  brown- In the U.S. brown is symbolized as reliable or natural. In India brown symbolizes mourning.

  black- In the U.S. black is symbolized as power, strength, or even evil. In Spain black symbolizes wealth.

  white- In the U.S. white symbolizes purity and cleanliness. In Asia white is symbolized as mourning.

  gray- In the U.S. gray is symbolized as gloom or depression. In Japan gray is symbolized as maturity and conservatism.

Tuesday, October 22, 2013

Graphic Formats

tiff - a format for image files(very large file)


tiff file

gif - loose format for compressing image files(very large file)


Gif file
 

jpg/jpeg - a type of graphical file format used for photos(small files)


jpg/jpeg file
 
png - file format for image compression(huge file)

png file


Monday, October 21, 2013

Color Definitions


Hue: a color or shade.  
Chroma: the purity or quality of color
Tint: the shade or diversity of a color
Tone: 
brightness, deepness, or hue of a tint or shade of a color.
Shade: how dark or light a color is
Complimentary Colors:
colors directly opposite each other in the color wheel 
Analogous Colors: primary or secondary colors on the color wheel, with two tertiary colors next to it.
Contrasting Colors:

colors directly opposite each other in the color wheel 
Texture: the feel or consistency of a surface
Graphic Design Principles: process of combining text and graphics
Balance:
the ways that lines, shapes, colors, etc. of a piece are arranged
Symmetry:
having the exact same design across an axes